When using a MacBook laptop, you might be willing to know how to enable dark mode on mac.You can try to make your screen darker for your eyes’ purposes on Apple. Thankfully, it’s nowadays easier to dim your screen and invert the colors that are different.
When you want to enable the dark mode on your screen, here is the procedure.You can also be able to switch to the light mode when you feel like.
How to enable dark mode on mac.
To enable the dark mode on a Mac, you move to the top left corner of your screen and click the apple logo. You can then select the system preferences and then click the general button in the pop up window. After that you click the dark or auto option that sets your mark on dark mode.
This procedure works in the following way:
1.Click the apple logo in the top left corner of your Mac’s screen.
2.You then select the system’s preferences.
3.The next step is to select ‘general’.
4. You then select ‘dark’.This is seen at the top of the Windows. It is just to the right of ‘appearance’.You can also select auto which automatically changes your screen to dark mode at night and turns it on to light mode during the day.
You should note that you need to upgrade to Mac OS Mojave in order to have the light and dark mode options on your screen.
Once you get the dark mode on your Mac, only certain applications like Safari, Mail, Maps, and others will go dark. Third party apps don’t go dark even after the setting that enables dark application.
If you use Safari to browse the internet, some websites may activate the dark mode but only if they are designed for it. If it doesn’t occur, you need to install an extension that will enable dark mode for your browser.
How to switch between dark modes and light modes.
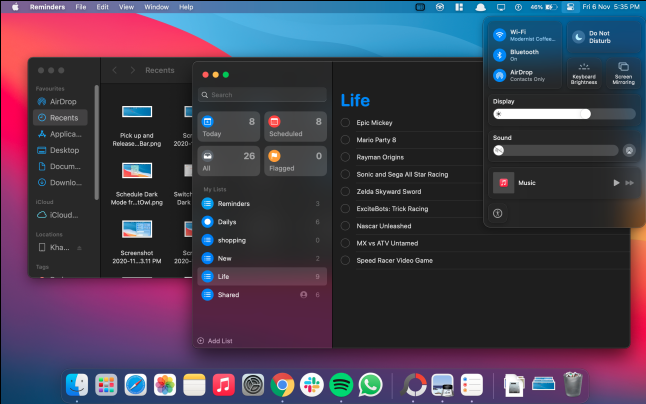
It is possible to switch between dark mode and light mode on your Mac by opening the control center at the top right corner of your screen. After that you can click the display button and select either dark mode or light mode.
How to open the control center on your Mac.
1.To open the control center on your Mac, you need to click the icon that looks like slider buttons. This icon is recognizable at the top right corner of your screen. It should also be noted that you can’t see the control center icon unless your computer has been upgraded to Mac OS Big Sur.
2.You then click ‘display’-you can click display anywhere inside the box but not the slider.
3.Finally, you click dark mode which gives you the option of either switching it on or off.
How to make your mac even darker.
If you want your Mac darker, you can click the control center icon at the top right corner of the screen. You then select ‘display’ and click dark mode and night shift. This turns both of them on.
Night shift is responsible for making your screen look less blue and more yellow, which helps your vision. You can also click ‘display preferences’ at the bottom of the pop up window.
You then go ahead and select ‘night shift’ and then drive the color temperature to ‘warmer’.This helps in reducing the level of the blue light coming from your screen helps reduce the strain in your eyes.
You can also create a schedule that enables the night shifts to turn on and off.
How to turn on dark mode using Siri.
If you have a compatible Mac, you can turn on dark mode using Siri.
Steps to follow:
-Click the Siri button on your Mac’s menu bar or the Siri button in your MacBook ‘Pro’ touch bar.
-Say a command that requests that it turns on the dark mode.
How to enable Dark mode on older Mac OS versions.
The older versions of Mac OS versions don’t have the capacity to accommodate some versions of turning off the dark mode like Mac OS Monterey and Mac OS Big Sur, which were the first to get the control center.
Earlier Mac OS releases like Mac OS Sierra and earlier versions have the dark mode only changing the system menu bar. It does not help much in adjusting system elements or apps. Only Mac OS Catalina and later versions have automatic dark mode features that activate and deactivate the feature.
These are the steps to be followed to activate night mode on earlier Mac OS releases:
Mac OS Sierra: –
-Open the system preference app.
-Click ‘general’.
-Check the box alongside the ‘dark menu bar’ and Dock
Mac OS Mojare: –
-Open the system preference app.
-Click ‘general’.
-Alongside appearance, select dark or auto.
Mac OS Catalina: –
-Open the system preference app.
-Click ‘general’.
-Alongside appearance, select dark or auto.
How to turn off dark mode on mac.
You just need to reverse the steps you followed in order to disable night mode on Mac. Instead of selecting ‘dark’, you just select ‘light’.In the later versions of Mac OS, you can select ‘auto’ to automatically turn it on at sunrise and off at sunset.
SUMMARY.
Dark mode helps in optimizing your work experience on a Mac. The option to be optimized helps you to work more efficiently on your laptop. The dark mode has the abilities that can help you tune in your Mac startup programs, free up extra RAM, and other advantages like helping to increase battery life. It doesn’t need any third party software or tools to install because it is a standard feature of Mac OS.